Achieve Perfect Seared Scallops: Easy Restaurant-Quality at Home
Imagine a dish that feels undeniably luxurious, tantalizing your senses with its golden-brown crust, tender, buttery interior, and a delicate, slightly sweet flavor. That's the magic of perfectly seared scallops. Often perceived as a high-end restaurant exclusive, the truth is that mastering restaurant-quality scallops in your own kitchen is surprisingly simple, requiring just a few fundamental techniques and a dash of confidence. Forget intimidating culinary school tricks; with the right approach, you can create a show-stopping meal in mere minutes.
For years, the thought of cooking scallops at home seemed daunting. Their delicate nature suggested complexity, and the potential for rubbery disappointment loomed large. However, after overcoming initial trepidation and a few trial runs, it became clear that these exquisite morsels are among the easiest proteins to prepare. There's no need for elaborate marinades or a pantry full of exotic spices—just a handful of quality ingredients and a commitment to the searing fundamentals. Once you unlock these secrets, you'll wonder why you ever hesitated.
The Secret to Restaurant-Quality Seared Scallops at Home
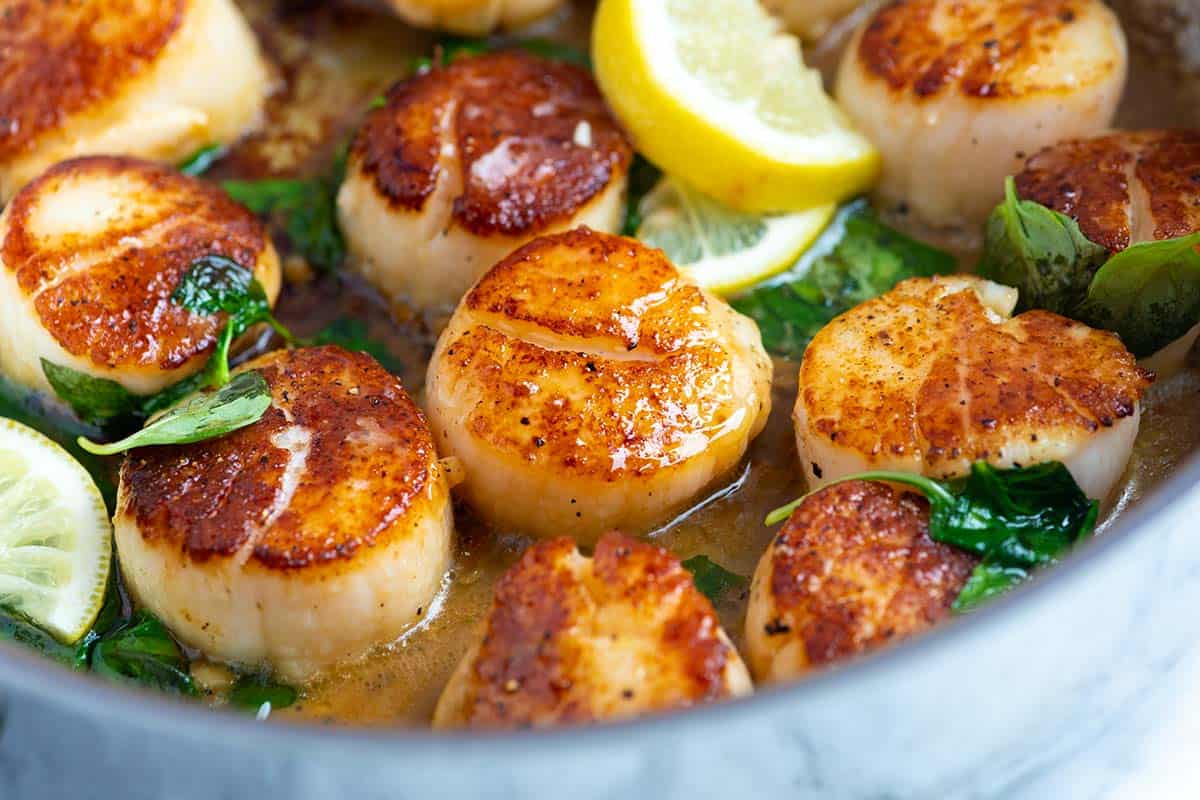
The allure of impeccably seared scallops lies in their exquisite texture and flavor contrast: that irresistible, deeply caramelized crust giving way to a succulent, melt-in-your-mouth center. What's the secret sauce behind this culinary marvel? It boils down to a powerful trinity: high heat, dry scallops, and patience. These three pillars are non-negotiable for achieving that coveted restaurant-grade finish.
Many home cooks shy away from scallops, believing they require expert hands. This couldn't be further from the truth. The high-end reputation often overshadows their inherent simplicity. By focusing on these core techniques, you bypass the common pitfalls that lead to less-than-perfect results. High heat is essential for kickstarting the Maillard reaction, the chemical process responsible for that delicious browning and complex flavor development. Dry scallops ensure that reaction happens effectively, preventing steaming. And patience? It's the silent ingredient that allows the crust to properly form and the scallop to naturally release from the pan, preventing tearing.
With these foundational principles in place, you’ll be crafting elegant dinners that look and taste like they've been prepared by a professional chef, all within about 15 minutes of active cooking time. For a deeper dive into these crucial elements, check out Secrets to Seared Scallops: Dry Scallops & High Heat Explained.
Starting with the Best: Choosing and Preparing Your Scallops
The journey to perfect seared scallops begins long before they hit the hot pan. The quality and initial preparation of your scallops are paramount. When shopping, you'll encounter two main types:
- "Dry" Scallops: These are untreated scallops, meaning they haven't been soaked in a phosphate solution. They have a natural, slightly off-white to pinkish hue and firm texture. Crucially, they contain very little excess moisture, making them ideal for searing as they brown beautifully.
- "Wet" Scallops: These scallops have been treated with a sodium tripolyphosphate solution to preserve them and extend shelf life. While safe to eat, this process causes them to absorb water, making them appear whiter and plumper. The extra moisture makes it incredibly difficult to achieve a good sear, as they tend to steam rather than caramelize, often resulting in a tough, rubbery texture. Always opt for "dry" scallops if possible.
The Essential Prep Steps:
- Remove the Side Muscle: Regardless of whether you choose fresh or frozen, most scallops come with a small, tough crescent-shaped "foot" or side muscle attached. This muscle is noticeably firmer and looks like a small tab on the side of each scallop. It's important to gently peel or pinch this off before cooking, as it becomes rubbery and unpleasant when cooked, detracting from the otherwise tender scallop.
- Pat Them Bone Dry: This step cannot be overstated. Even "dry" scallops will have surface moisture that needs to be removed. Blot each scallop thoroughly with paper towels. You might even want to let them air dry on a wire rack in the refrigerator for 15-30 minutes for ultimate dryness. Any residual moisture on the scallop's surface will prevent the Maillard reaction from occurring, leading to steaming instead of searing.
- Fresh vs. Frozen: Fresh scallops are always preferred for their superior texture and flavor. However, high-quality frozen scallops are a perfectly acceptable alternative. If using frozen, ensure they are thawed completely in the refrigerator overnight. Once thawed, give them an extra-thorough pat-down with paper towels to eliminate as much moisture as possible before cooking.
Mastering the Sear: Heat, Oil, and Timing
With perfectly prepared scallops in hand, it's time to unleash the magic of the sear. This stage is where the principles of high heat and patience truly come into play.
Choosing the Right Pan and Oil:
- The Pan: Ditch the non-stick skillet for this task. Non-stick coatings are not designed for the high heat necessary for effective searing, and they can inhibit the crucial caramelization process. Your best friends here are a heavy-bottomed stainless steel frying pan or a well-seasoned cast-iron skillet. These materials retain heat exceptionally well and provide the ideal surface for that glorious crust.
- The Oil: Because you'll be cooking at a high temperature, select an oil with a high smoke point. Good choices include vegetable oil, canola oil, grapeseed oil, or avocado oil. Save your delicate extra virgin olive oil for a finishing drizzle after the scallops are cooked, as its low smoke point will cause it to burn and impart a bitter flavor at high heat.
The Searing Process:
- Heat the Pan: Place your chosen pan over medium-high to high heat. You want it screaming hot. A good test is to add a tiny drop of water; it should evaporate immediately.
- Add Oil: Once the pan is hot, add a thin layer of your chosen high smoke point oil. Swirl to coat the bottom, then let it heat for another 30 seconds until it shimmers slightly.
- Sear the Scallops (First Side): Carefully place the dried scallops into the hot pan, ensuring there’s enough space between each one to prevent overcrowding (cook in batches if necessary). Overcrowding will lower the pan's temperature and cause steaming. This is where patience is key: do not touch or move the scallops for a full 2.5 to 3 minutes! This undisturbed time allows the beautiful golden-brown crust to develop fully. This crust also helps the scallop release effortlessly from the pan. For more in-depth advice on achieving that coveted golden crust, be sure to read Unlock Golden Crust: Essential Tips for Perfect Seared Scallops.
- Flip and Finish (Second Side): After 2.5-3 minutes, peek at a scallop. If it has a deep golden-brown, caramelized crust, it’s time to flip. Use tongs to gently turn each scallop.
- Add Flavor (Optional): Immediately after flipping, you can add a tablespoon or two of unsalted butter to the pan. For extra depth, toss in a smashed garlic clove and a sprig of fresh thyme or rosemary. Briefly baste the scallops with the melted, infused butter as they finish cooking on the second side.
- Cook to Perfection: Depending on the size of your scallops (e.g., larger 10/20 count scallops, meaning 10-20 per pound), the second side will only need an additional 1 to 2.5 minutes. The goal is a scallop that is golden on both sides with a slightly translucent, moist, and buttery center. Overcooking will make them rubbery.
- Remove Immediately: As soon as the scallops are perfectly seared, remove them from the pan. Carryover cooking will continue for a moment, so taking them out promptly prevents them from becoming tough.
Beyond the Basics: Enhancing Your Seared Scallops
While a simple sprinkle of salt and pepper is often all that's needed for truly delicious seared scallops, a few finishing touches can elevate them to extraordinary.
- Simple Seasoning: A generous pinch of flaky sea salt and freshly cracked black pepper before and after searing will highlight their natural sweetness and delicate brininess.
- Brightening with Acid: A squeeze of fresh lemon juice immediately after removing them from the pan adds a vibrant counterpoint to the richness of the scallops and butter. A splash of white wine, reduced in the pan with butter, also makes a fantastic pan sauce.
- Herbaceous Notes: Fresh herbs like finely chopped chives, parsley, or tarragon sprinkled over the finished scallops add a fresh, aromatic finish.
- Richness: For an extra decadent touch, a drizzle of high-quality extra virgin olive oil or a knob of cold butter swirled into the hot pan just before serving adds a silky mouthfeel and luxurious flavor.
Serving Suggestions:
The versatility of seared scallops makes them suitable for a variety of occasions, from an elegant date night to a quick weeknight meal.
- Classic Pairings: Serve them atop a bed of creamy risotto (lemon-parmesan or mushroom), al dente pasta with a light white wine sauce, or a fresh, crisp green salad with a vinaigrette.
- Heartier Sides: They also shine alongside fluffy mashed potatoes, polenta, roasted asparagus, or a medley of seasonal roasted vegetables.
- Appetizer Style: Arrange them artfully on a small plate with a drizzle of chimichurri or a sprinkle of microgreens for a sophisticated starter.
The beauty of perfectly seared scallops lies in their deceptive simplicity. With just a few key techniques—choosing dry scallops, meticulous drying, high heat, and patience—you can confidently recreate that coveted restaurant-quality experience in your own kitchen. This isn't just a recipe; it's a testament to how focusing on fundamental principles can transform everyday ingredients into an extraordinary meal. So, gather your ingredients, heat your pan, and prepare to impress yourself and your guests with a dish that embodies both luxury and ease.
